Yoga Unpacked
The Originator of the Backbend – Urdhva Dhanurasana
Urdhva Dhanurasana, or Wheel Pose, is a deep backbend that requires a complex combination of strength and flexibility. So complex in fact, that the intricacies of our nervous system play a major supporting role in the right execution of this technique.
It is a wonderful pose that can boost energy, counteract the effects of sitting, open the heart chakra and strengthen the back, arms, glutes and hamstrings whilst stretching the abdomen, hip flexors, shoulders, chest and quadriceps.
It’s a very demanding pose that can often leave students feeling ‘tweaky’ in their lower backs and preparation and understanding is key. There are a number of things you can work on to eliminate the obstacles that stand between you, and being completely assured and comfortable and pain-free in this highly beneficial exercise.
Where did it come from?
Referred to also as Chakrasana, which translates form Sanskrit into Wheel, this pose started showing up in the works of Pattabhi Jois (modern Ashtanga Yoga) and BKS Iyengar (Iyengar Yoga) who were both disciples of Tirumalai Krishnamacharya in Mysore, now located in southern India.
Stemming from the massively varied and adopted Ashtanga yoga family, the backbend is in a class of its own. Because of its relative difficulty in execution, and commitment it requires, the suggested rewards in addition to added strength and flexibility, range from fighting respiratory illness to helping control anxiety and this deep stretch is incredibly effective for opening up your heart centre (Anahata Chakra). This activation can be overwhelming if you are completely new to yoga and soul lifting practices, so it’s crucial to do your research and ease yourself in slowly.
Building up to it…
There is an inherent necessity for the integration of some of the foundational poses, in preparation for getting the ‘Wheel’ in motion. The great thing about yoga in general is that you don’t have to practise the wheel pose itself over and over to get it right.
Working on the fundamentals and focusing on the areas of the body needed for wheel pose can be extremely beneficial. There are isolated postures and sequences that will give you the best possible chance of nailing down the wheel pose when you come to it.
Examples include:

Active Puppy Pose with chair (Shoulders / Latissimus Dorsi):
Materials needed:
Action: This variation differs slightly to the conventional puppy which is more passive a posture. In an active puppy pose you are instead placing the onus on your hands and working to drive them through the mat and create an active stretch. The hands can be placed on a chair or the floor. As you push through the hands:
- Draw the ribs in toward the entire back body feeling a slight rounding of the upper back.
- Slight tuck the tailbone.
- As you find engagement throughout the body reach the chest down to the floor but you will notice that you don’t lower as much as you would in regular puppy pose. This is ok!
- As you hold this pose for around 5 breaths or 30 seconds, breathe space into the ribs and feel a 360 degrees breath.
- Repeat this 1-3 times.
Modification: You can come onto the knife edge of your hands, palms facing each other, pressing firmly through the sides of the hands.
Rewards: This variation helps you to stretch the lats which for lots of us can be tight and tight lats make wheel pose even harder!

Banded Clap (Rotator cuff and lats)
Materials needed:
- Your mat
- A circular resistance band (I go with medium-heavy but see what feels right for your body).
Action: We start this one by wrapping a resistance band around the elbows and coming into a child’s pose position.
- From there, we place our hands together pointing the fingers toward the sky, with our elbows positioned around shoulder width apart.
- Draw the ribs in, the back will be rounded and shrug the shoulders towards the ears, wrapping the armpits towards each other.
- The repetition is a clap motion, aiming to open the hands to bring the arms parallel without arching the back or flexing at the wrists; the movement comes from the shoulders.
- Go through this around 10-12 times.
Modification: The closer the elbows are to your body the easier this one is.
Rewards: This is a tricky exercise that will get easier over time and help to improve shoulder flexion for wheel.

Active lunge (Gluteus Maximus and hip flexors):
Materials needed:
Action: This lunge looks like a conventional lunge but has a strong focus on muscle activation.
- Starting from either a 90 / 90 lunge position or slightly deeper, pull the front foot back in space and simultaneously drive your back knee forward. The legs aren’t moving but you feel activation in your leg muscles and hips, in particular make sure the back glute is activated.
- Think of the motion like there is a huge squishy ball in the middle of your front foot and back knee, and you are trying desperately to keep it squished.
- Hold this pose for around 5 breaths or 30 seconds and repeat on both sides 1-3 times.
Progression: Over time you can work on making the lunge deeper but keeping the feeling of strength so you are dumping down into your hips.
Rewards: This is such a great way to stretch the hip flexors. Eccentric exercises like this are thought to be more effective than stretches for lengthening muscles.

Sky diver lifts (spinal extension, glutes and hamstrings):
Materials needed:
Action: This strong stretch is vital for building a strong foundation and a strong back back and open front body in preparation for the Wheel pose.
- Start lying belly down on the mat, bending the knees so your feet are in the air and keeping the legs hip distance apart.
- Bring the arms out to the sides of the body in a cactus shape
- As you take a deep inhale, lift the upper and lower body (imagine you are skydiving)! As you lift, keep in mind the spine being long and the back body being strong (including glutes)! With the chin tucked gently and pressing back in space to help you open up the thoracic (upper) spine.
- Exhale and release – aim to do 5 to 10 of these lifts and for the last one – a 5 breath or 30 second hold.
Progression: Can you hold this stretch for 60 seconds or more…?
Rewards: This helps with all elements of wheel pose 🙂
For many more of these exercises which will help power up your wheel pose, check out my beautiful backbends series here. This series completely transformed my backbends giving me freedom and openness I have never experienced before!
An added weapon in your arsenal – Brain Hacks
Did you know that there are certain areas of the brain that help with flexor and extensor tone? And why is this helpful for wheel?
It’s helpful, because we need shoulder flexion in wheel as our arms are above our head and at the same time we need hip extension.
There are so many brain hacks we can play with to help our wheel, some will work for you and others may not – we are all different. Try out the couple below testing before and after and seeing if it helps with your body.
- Humming Bee Breath (Bhramari)
This can help with shoulder flexion:
- Try a pose that involves shoulder flexion like a wheel (if you’re warm) or low lunge with the arms above the head, opening through the upper back. Perhaps take a photo or just notice how it feels in your body.
- Now try the following for 5-10 rounds…
- Sit in a comfortable seated position and inhale slowly through the nose to prepare and release the exhale as a medium to low, slow hum in the throat, like the murmuring of bees, extending the breath for as long as possible.
- Notice the sensation of the vibrations on your throat, mouth and teeth. Tune in fully to the breath.
- Now try the pose involving shoulder flexion again and see if this helped!
- Lung Pop
This can help with hip extension:
- Try a pose that involves hip extension like a wheel (if you’re warm) or a long low lunge. Perhaps take a photo or just notice how it feels in your body.
- From a shortish low lunge position, right foot forward and foot pulling back as the left knee draws forwards, stabilising through the hips and activating the legs.
- Inhale the left hand high, lifting the shoulder and exhale as you take a side bend. On the next inhale, take a full inhale through the nose expanding as much as you can through the ribs, focussing on breathing space into the ribs. When you can inhale no more, gently release the breath through the nose. Repeat 3 times. Repeat on the opposite side.
- Now try the pose involving hip extension again and see if this helped!
I have tons more hacks like this in a free video here, be sure to check them out if you want to optimise your brain’s natural ability to adjust to challenging poses.
Wheel pose – how to
So, after you’ve taken on all of the necessary key steps in preparing you for this amazing exercise. I’ve broken down below simpler terms for you to follow along from your mat, but before you get started, remember some key considerations.
- Prepare: don’t try wheel pose before warming up the relevant parts of your body!
- Breathe into it, and stay with your natural rhythm: Let’s use our breath to help our body realise it is safe (crucial for opening up for wheel pose) and also it’s a sign that we may need to tweak the pose. If your breath is stuck, try easing out of the pose slightly to help find comfort.
- Trust your body: To execute this pose, full belief in what your body can do, and the lessons you’ve taught it leading up to this is integral to getting the wheel pose right. If you falter at the first time, or even the hundredth time, don’t get disheartened. This pose serves as a catalyst for most of the other postures you will dive into in your journey, so upon nailing this one, the others will come easy!
Let’s do this!
Step One: Set the foundations
- Come to lie flat on your back, ensure plenty of space and free yourself from any distractions (maybe pop the cat in another room!)
- Take a few slow, controlled, conscious breaths. This puts you in the driver’s seat – you are in control over your body, and you are going to see this exercise through to the best of your ability.
- Bend your knees, soles of feet flat and hip width apart and about a hands distance from the body. The toes can face forwards or some people find turning the toes out slightly or widening the stance can be beneficial.
- Bend your elbows and bring the palms of your hands overhead placing them just above the shoulders, elbows facing the ceiling and fingers pointing towards your feet.
Step Two: Peel up
- As you exhale, gently peel your lower back off the mat, starting with the tailbone, piece by piece feeling the feet push firmly into the mat, glutes engage and finding as much length through the spine as possible. Option to stay here!
- If you wish to continue, press firmly through your hands whilst continuing to drive your feet into the mat, and whilst you inhale straighten your arms to lift your shoulders and head off the mat keeping the elbows drawing in (rather than winging out).
Step Three: Breathe
- Stay with your breath as you think about reaching the chest towards the wall behind you. A gentle rocking backwards and forward motion can help open into the chest and shoulders.
- If sensations become too intense please release the pose or slightly bending the elbows can help too. If you are feeling any tension in the lower back, try breathing forward into the chest and shoulders more or come onto tip-toes to give yourself space.
- See if you can hold for five breaths or more.
Step Four: Coming Down
- Come down gently and with control (it’s tempting to come down quickly I know).
- Tuck your chin to prepare, and then lower down slowly piece by piece.
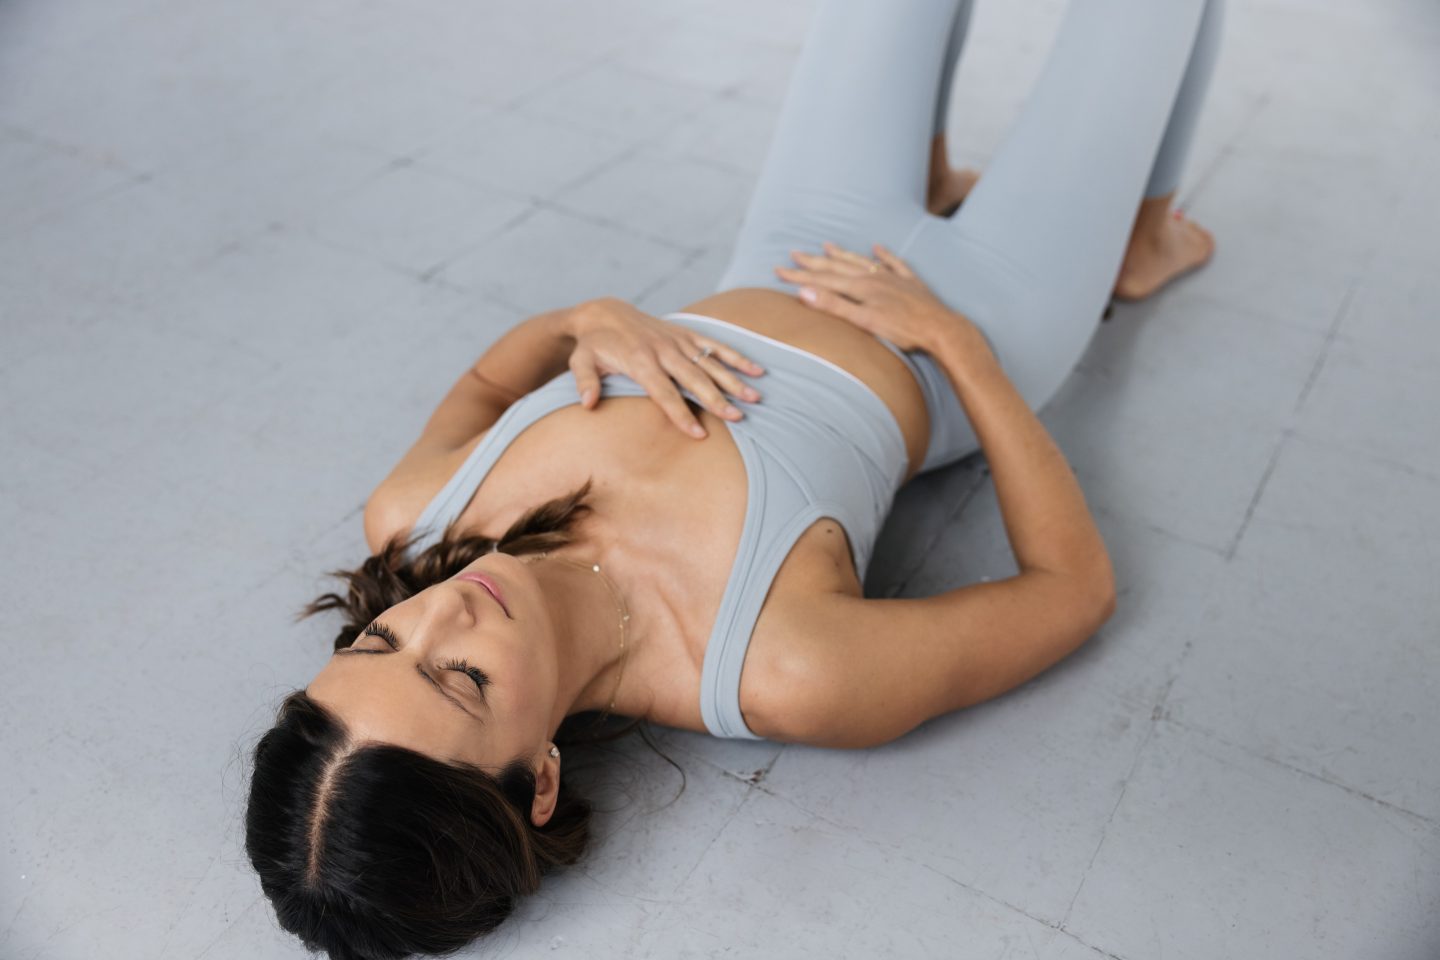
- Take a moment to pause at the bottom without moving anything. Notice how it felt in your body, any sensations or emotions that arose and perhaps any areas that felt more difficult to engage or open.
Need more help?
I have designed a whole month-long series on the Yoga Happy app to help you find depth and comfort in your wheel pose. I lead you through 31-days of classes to eliminate all obstacles that stand between you and a wonderful backbend. Check it out now!